Pages

Friday, November 28, 2014

DIY Wedding Invitation


We are very proud sharing with you our wedding invitation. We wanted a non traditional invite for our wedding and wanted not to splurge much for it. 

Materials were bought in National Bookstore. Hal was in-charge of measuring the size of the layout and I am in-charge of the design using Photoshop. Hal assisted me with printing and cutting. We used Epson L800 for printing. 

Pros: 
More bonding time for the couple
Will enhance your Photoshop skills
You can easily update your invitation details
You’ll save a lot of bucks

Cons:
Possible petty fights if your hubby doesn’t want to cooperate or lazy 
You’ll get a bit frustrated if you wasn’t able to achieve your desired style and design
You’ll get sleepless nights in cutting and working on it 

Overall, I am happy with the results. We also spent less than 1,000Php for our invites, so it’s very worth the effort. It’s just a simple invite but we've made it out of love. 


Our Second and Official Prenup Shoot


#JuliusGladysWedding2014
Finally, I was able to update and show you our official (unedited) prenuptial photos. These were taken last October 14 at Stonecrest clubhouse in San Pedro Laguna.  

We actually had a hard time deciding on our prenup location. First, we had to consider cost, because we already spent some bucks renting a van to Caliraya, we wanted to save as much as we can this time. Second, we wanted to minimize the effort in bringing stuffs like props and dresses while preparing for the shoot. Basically the effort we have done during the first prenup shoot made me realized that we should’ve prepared more like bringing a fan and more refreshments. It was really exhausted especially I did my own makeup during the first shoot. 

Se here’s what we have decided; we utilized our reception venue for our prenup shoot. We had the convenience of the distance and free location plus lesser gas expense. We still rented a van so we can bring our stuffs conveniently. 

Jona, my dear friend and from Posh Events is our stylist. I am so glad that she helped us out with the concept and the outfit that we will be wearing. Super big thanks to her! 

We also finally meet Nini our official HMUA. We easily get along as she’s very bubbly and so comfortable to be with. She’s full of kwento’s so there’s really no dead air and bad vibes at all. We are really meant to be! 

And also, we finally meet the Jr’s team that’s in-charge of our wedding photos from Parkershot Photography. First impression was they were shy and serious but eventually they were nice and comfortable to work with during the shoot. They were very keen to details like ensuring our dress looks okay and to get our most natural smile. The only thing that we’ve noticed was they do not have any reflector during the shoot so I guess it took time for them to setup the camera for lighting. 

Style theme: CAUTION in love

"Caution in love is perhaps the most fatal to true happiness" - Bertrand Russell
Style Theme: Playful; we use party spray strings :) 
We've messed a lot 
Style Theme: Formal; did I mention I just borrowed this cute dress from Jona :)
My favorite shot of the day :) 
Tips for a successful prenup shoot:
1. Be comfortable - practice your best angle beforehand but do not pressure yourself
2. Bring plenty of food and water for your team – we do not want them to be hungry and bored and we need to make sure to take care of them too.
3. Eat well as prenup shoot is very exhausting
4. It’s better to have someone to check you during the shoot, (Is your undergarments peeking? Do you have the fake smile? Are you doing awkward poses?) It’s a friend, relative or a professional stylist as long as they are good with it. 
5. Read a lot of articles for tips, poses, and ideas. This will help you build the concept of your shoot. 
6. Enjoy! It’s not everyday that you’re doing this so have fun as always! 

The team (left- right: Jr - Senior Photographer, Ms. Nini Marquez - HMUA, Me, Hal, Jona - Friend/Stylist, Jr's Assistant)


Thursday, October 30, 2014

DIY Wedding Pin Wheel


Whimsy Pin Wheel :)

To make our theme more whimsy, I decided to add pinwheels to the theme. So I decided to create pinwheels for my entourage.

Materials Used:

1. Wrapping Paper Book
2. Glue
3. Stick Balloons – Cut in half
4. Buttons
5. Ruler, Pencils and Scissors

First thing to do is to resize your papers into squares. I also wanted to have prints on both sides so I brush some glue and stick 2 different patterns together.

Trace four diagonal lines from the corners of the squares towards the center. Make sure not to cut farther to the center. Make sure to leave few centimeters, I estimate it depending on how far the fold will reach the center.  (1 and a half inch for me I guess)

After you cut all sides, fold on the same side working clockwise to the center of the square then glued it on.

I glued the button on top and glued the stick on the back.

As you’ll notice, my pinwheel will not turn. I decided to have it the easy way since it’s created purely as my wedding decoration. If you want your pinwheel to be fully functional, you can use pins and push it in a wooden stick. I'll be adding more soon for the decors.

Happy Preps :)


DIY Wedding Send Off Shakers

Celebration shakers is one thing to add noise and festivity as we make our way back down the aisle


A very easy DIY for your wedding.

Materials used:

1. Balloon Sticks – Cut in half
2. Ribbons – (Colors of your motif)
3. Bells
4. Glue gun and glue stick
5. Silver string (tied to the bell before gluing)

I used silver strings, tied it to my bells first then I cut the ribbon my desired lengths. I glued everything on top together with the bells. Very easy!


Thursday, September 25, 2014

Infinity Dress: Entourage Dresses

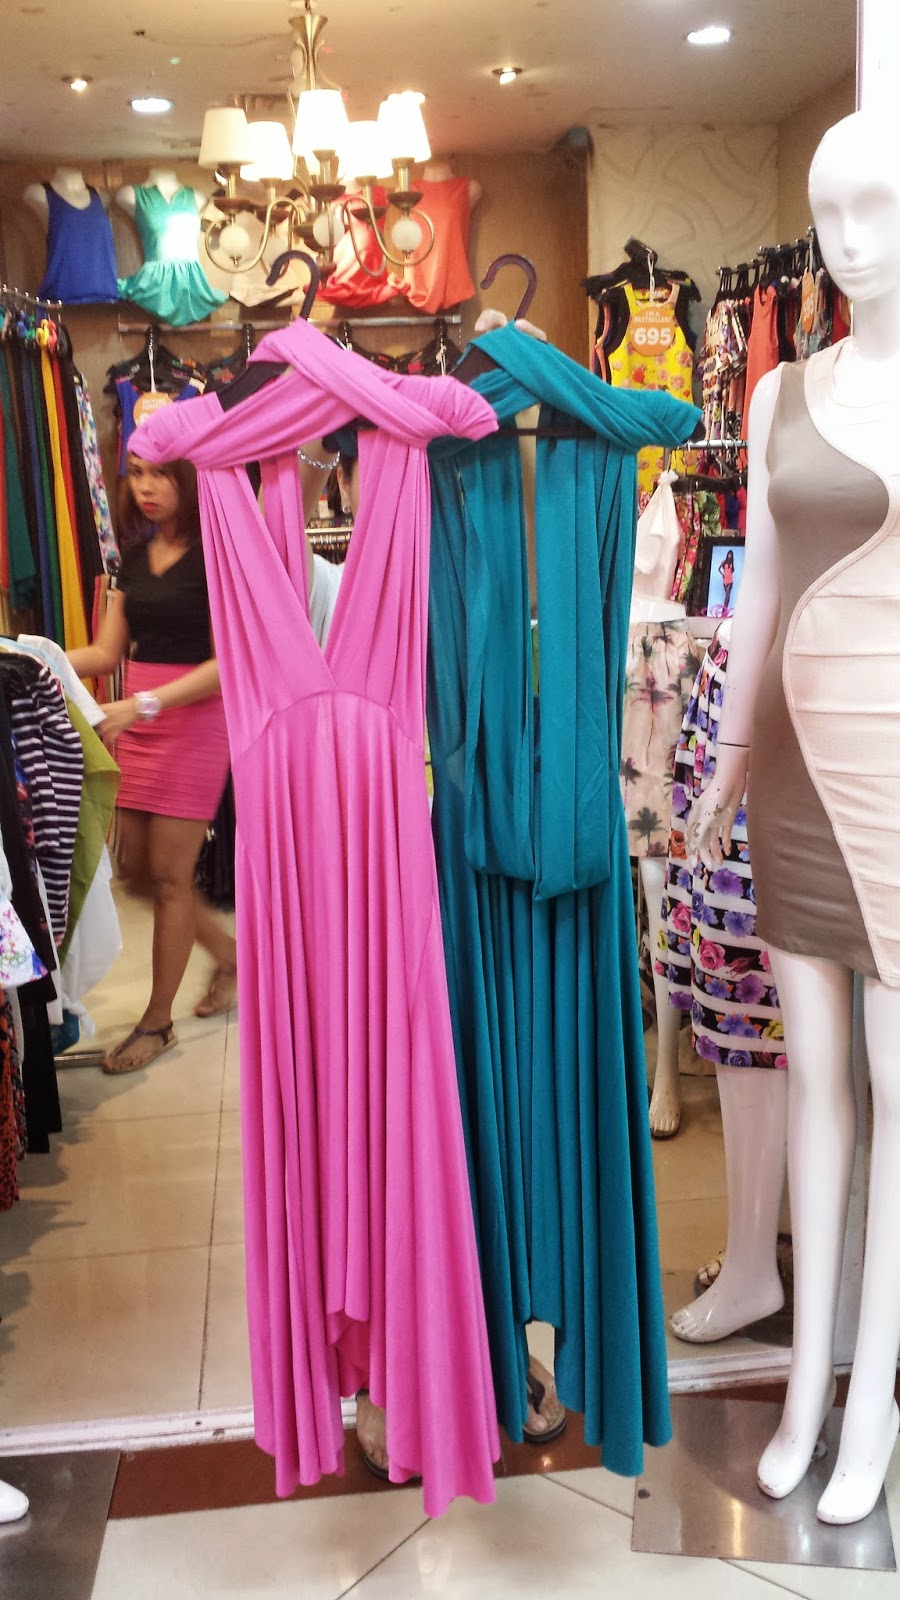
I’m already eyeing Infinity dress, sometimes called 7-Ways to be the dress of my entourage. It’s an easy pick for me since they will be paying for their own dress; I know they would also want a dress that they can wear again.

Infinity Dresses Inspirations:

Source
Source

We initially planned on buying a cloth and hire a dressmaker, then we changed our mind and we decided to buy online but I am so impatient to wait for their sizes. Then after seeing an affordable dress in Divisoria, we immediately ordered sets for our entourage. Good thing this ready to wear dresses also have plus sizes so no problem for our plus sizes girls. Apparently for the plus sizes, colors were limited so we decided to mix colors. For my Maid of Honor, I bought Gray and in long cut, Bridesmaid in Teal-Green and Secondary Sponsors in Pink.

The Infinity dresses that we selected

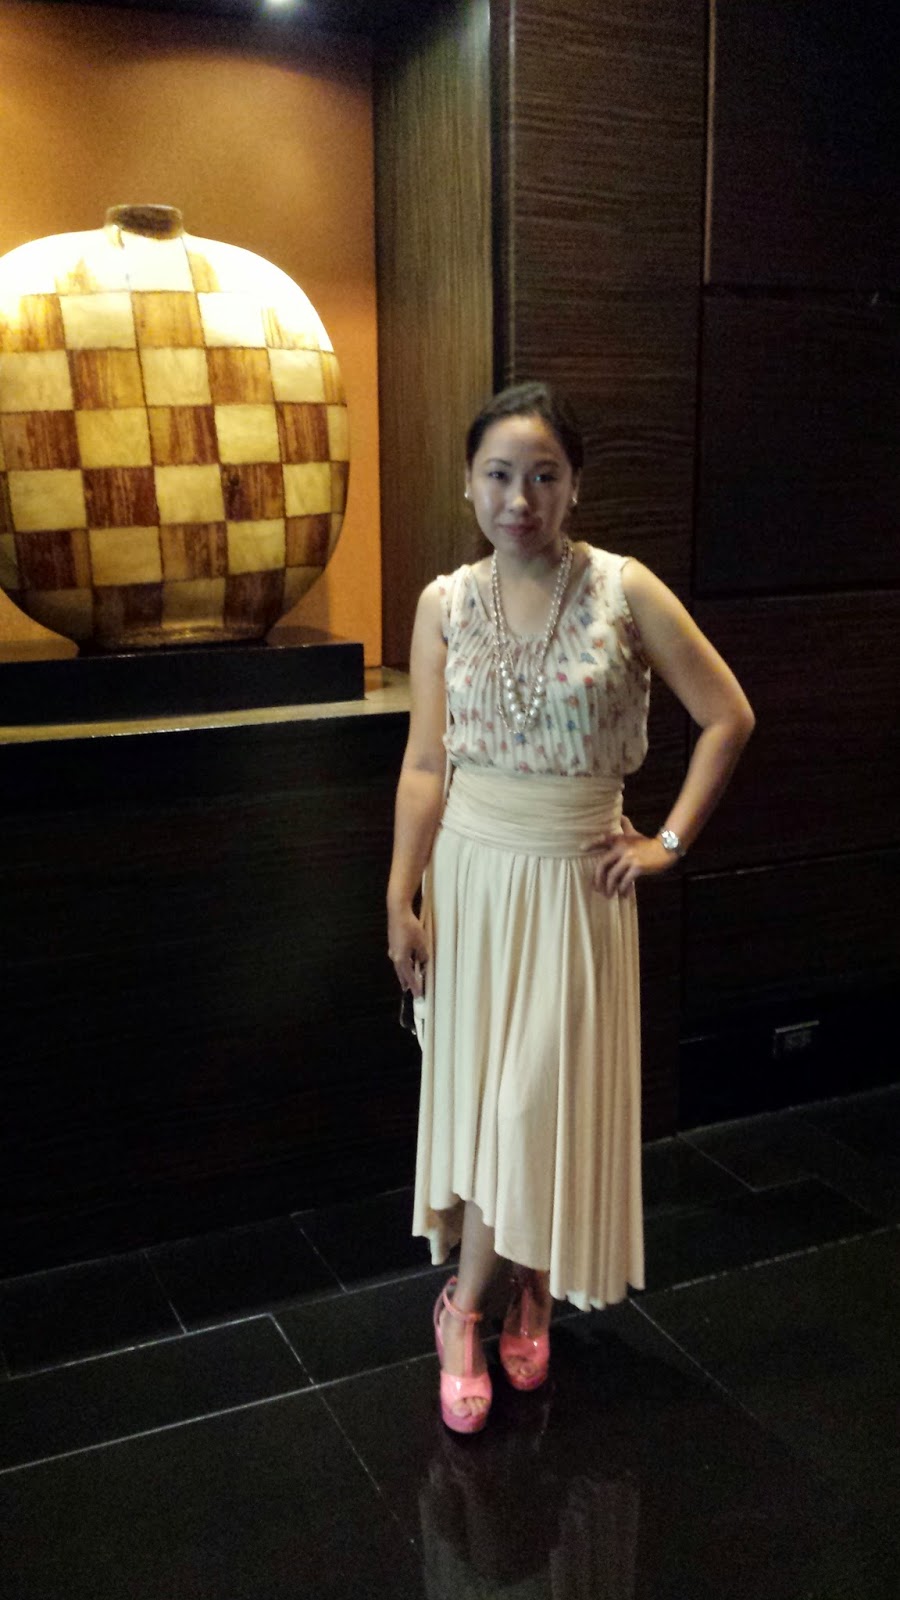
I also bought one for myself so I can try it. I even can't wait and wear it at a friend's wedding. I used the dress as a skirt and paired it with my floral top. 

And this is my Infinity dress as a skirt :)

There’s a lot of tutorials online on how to design your infinity dress, you can check Youtube and Henkaa

Happy preps! 


Saturday, September 13, 2014

Wedding Reception: StoneCrest Clubhouse

Since we do have a non negotiable Church which is St. Peregrine Laziosi in Muntinlupa, we really had a hard time looking for our “This is it” wedding reception. Because we are on the South Area, there are not so very much choices. I do not want a hotel wedding reception as I want an exclusive and homey feel. And also, hotel reception may double up our budget. We also prefer not getting an in-house catering as hiring a professional caterer for me will do so much better in terms of food and styling since it’s their forte and main business. So what we were planning is looking for a spacious clubhouse or a resort so we can do an after-pool party. We had our list and nah-dah…

First option is in Lindenwoods however endorsement from the residents is needed and they do not accept early reservations.

Another option is to push through in finding a resort near the area however we can’t find a resort that will fit 150pax and not very pleasant looking for a wedding. Some garden receptions we checked only allowed in-house catering, and also, not very pretty.

Then on our way home, we decided to check StoneCrest Village Clubhouse.


Initially its not part of our option as we thought it’s too much for our budget. We saw 20k only for the 4 hours rental plus corkage fees. And the pictures we saw in the internet were not that pleasing. However we still decided to check the place since it’s along our way.

Then we had the “This is it”

Spacious and beautiful, since another gate separates the clubhouse from the residential area, it had a homey feel for us. The person-in-charge was also accommodating and gave all the information we need. We realized that we have an option to rent the pool deck or the function hall or both. The 20k posted is for the entire place, so you know, if you’ll rent either of the two, its not really bad.

Styling is possible as you can decorate and add DIY decorations to make it more personalize and with the theme.

What we do not like is it’s true that they do have a lot of corkage fee that can eat huge amount. So we decided to stick to their accredited caterer as it has the biggest corkage fee.

It’s fairly accessible as long as you’ll take the expressway route. We initially wanted a garden, open space venue but who knows weather now is unpredictable so we booked the banquet hall.


Credits to: 
http://nonimendoza.com/Projects/Stonecrest%20CC/Stonecrest%20images/Stonecrest.jpg
http://static.panoramio.com/photos/large/16794537.jpg

Thursday, September 11, 2014

100 Days Left and our First Prenup Shoot

It's 100 days to go before the big day! 

Yey and I am now ready to share you our first prenup photos by DPS team! The main photographer is a friend so this is an almost freenup pictorial session. He gave us a very special rate as they are just building their portfolio. They are Laguna-based photographers so we decided to go all the way to Pagsanjan for a shoot. Our photographer is the one who selected the location. We paid 20Php per person for the entrance but the guard charged us another 500Php because of the prenup shoot.

I also do not have HMUA because I’m saving my prenup HMUA package for our official prenup session with our main photographer. After a very tough decision, I decided to do my own make up. Sadly, I’m not good in fixing my hair so as you can see; it’s just how it is. I also do not wear make up all the time but thanks to plenty of online tutorials and confidence of course, I was able to pull it off. Oh I just love the result of my effort! Okay, next time I'll learn how to apply fake eyelashes so I can add more volume on it, and will learn some contouring or maybe just enroll to a make-up class. Haha! Any way I am just so proud of myself here! 

The gown I used here was borrowed from my officemate. She wore it just once at our God’s and Goddesses themed party in the office. I bought the floral headwear from Divisoria. We tag 2 of our friends along to be our critic, to help us with our outfits and stuffs and to be more relaxed during the shoot. 

All pictures here are RAW files from our photographers but I enhanced it a bit using Photoshop. 


As you can see, the hue of the photos below are more vibrant yellow-ish color. The pictures below were taken by the 2nd photographer, and obviously my favorite shots were from this set. 


Since we are into balloon business, we brought some spare balloons and incorporate it in our prenup shots.


After our late lunch together with the gang, we went straight to Liliw for a shoe hunt. And that ended our trip.

Prenuptial pictorial especially if it’s outdoor is very tiring!  Remember to bring hydration along and wear a sunscreen. I realized I got tanned after the day. Better to do your prenup on weekdays so lesser people around.

It’s exhausting yet it was fun especially if you have cool and professional photographers with you that will help you with the poses. It’s also an advantage if you’re good in posing and playing with the camera but for me, even I'm watching ANTM, applying was not that easy. Hal seemed more relaxed than me; I need to do better on our next prenup. Can't wait.


Photographer: Dream Pictures Studio (DPS) by Jonathan Sieras
Venue: Japanese Garden, Caliraya Laguna

Wednesday, August 27, 2014

2nd DIY: Will You Be Our Ninong/Ninang Card

We decided to just edit our Save The Date card to be our Will You Be Cards for our Ninong and Ninang. The envelopes were DIY-ed too. We also printed small version of our monogram for the envelope seal. We wanted our future Ninongs and Ninangs to have these printed invites to make it extra special. We personally gave these to them upon informing them about the marriage. :)


First DIY: Save The Date

The first DIY is our Save The Date card. After hours of browsing the net for idea and design, I fell in love with the minimalist yet cute design from from Weddingchicks.com. So I decided that instead of creating one, I downloaded the free invitation template and had it customized using Photoshop. It’s really an easy job because I love Photoshop editing is very used to it. Hal approved it immediately! We just had it forwarded to our friends and relatives via Facebook instead. Not only that we save a few bucks, paperless is Earth friendly. :)


Thursday, August 21, 2014

In search for the chosen Photographer/ Videographer

Memories will last for a lifetime, that’s why we wanted to invest on having a professional photographer and videographer team to work on our wedding. The flaws are, if you want the best, it’s expensive, and probably eat the entire budget just for the shoot. Yeah, I know investing here is because of the output, the talent and effort put all in there equals WOW. However, budget couples may have some other priorities to consider, or maybe if I have millions to spend for my wedding, why not. However for a budget couple that does not want to splurge just for a day, call me practical or kuripot. What I’m looking for is something that you’ll feel the worth.

We had Parkershot Photography, what I like was we was able to talk to Joan the General Manager and the wife of the photographer. And since we are already negotiating with them, we gave them their budget and adjust to their capabilities. They will do the Video and Photo coverage of the wedding. What I like was we are very comfortable talking to her and we saw professionalism. She’s not pushy and I can feel the passion on what they are doing.


I am hoping that it will turn out just perfect.

Looking forward for the e-session and the wedding day, I’ll definitely update you for the feedback. 

Our Fab Mood: Gray, Pink and Teal Wedding

Sorry for being gone for a while, yeah you know already, busy with the business and other stuffs. We are now starting to do the wedding preps again after months of being lazy. So to start, here’s our wedding color palette. 


Image Credits: Google


Template by BloggerCandy.com